I have two Fritz!Box 7390 (one at my place and one at my parents primary residence) and one Fritz!Box 7270 devices (the house they are building). They are pretty reasonable “high end” ADSL routers and a cool feature is they integrated VPN support. I use this functionality to connect the three networks securely together (but that is not what this post is about). This VPN functionality can also be used to connect to your home network while not at home, but information on how to do this from Linux is very sparse (specially if you only want to use FOSS tools to do the connection), so here is how I did it.
Configuring your Fritz!Box
To set up your Fritz!Box you need a configuration file, there is no GUI available in the web interface to support create new VPN configurations. While a number of sites have pre-built .cfg files that look like they should work, my Fritz!Boxes only accept encrypted VPN configuration files (see end of post for more information) and no open source tool exists to encrypt them.
I instead needed to use the FRITZ!Box VPN Connection tool (while it is a Windows program but runs fine under Wine) to create the configuration. It can be downloaded from the AVM website (This is different to the VPN client that AVM also provide). Annoyingly the tool doesn’t just read existing .cfg configuration files, it instead reads it’s own vpnadmin.cfg found in c:/users/your username/Application Data/AVM/FRITZ!VPN and then generates a .cfg file and encrypts it.
Using the FRITZ!Box VPN Connection tool to create a configuration that is compatible with vpnc you must:
- Select “Configure VPN for one User” type connection
- On the “Select Device” screen, select “iPhone, iPod touch or iPad” option
- On the “Enter the user’s email address” screen, despite the admin tool calling this field the user email, just enter a username. I recommend not having any special characters like @ or . in it.
- On the “Enter IP address of the User” screen, be careful about what IP address you use (the default should be okay).
- Don’t use the same IP address that the computer uses when connected via wireless/wired. While it seems like a good idea, as the computer would have the same IP address even when remote, it does not work and will mean the device is unable to access the internet when connected to wireless/wired.
- The “Send all data over the VPN tunnel” option on this page does not seem to affect vpnc, it will always route all your data over the vpn connection. See later for how to fix this problem.
- On the “Key for the connection” screen enter a password. Copy down the shared secret key, you’ll want it when creating the vpnc config. I recommend also keeping the default shared secret key it generates unless your super paranoid about entropy.
You can check that you have done this correctly in two ways;
- The vpnadmin.cfg will have the
iphone=1 and xauth_key="your password" options. See below for a partial example;
...
  user {
    nameoremail = "xxxx";
    key = "xxxxxxxxxxxxxxxxxxxxxxxxxxxxxxxxxxxxxxxx";
    ip = 192.168.179.201;
    internetaccess = 0;
    iphone = 1;
    xauth_key = "xxxxx";
  }
...
- If you export an unencrypted config file (remember this can’t be loaded onto the Fritz!Box – so make sure you also export an encrypted version!), the remoteid section will have a key field and not a fqdn field, use_xauth will be set to yes and an xauth section will exist. See below for a partial example;
...
  keepalive_ip = 0.0.0.0;
  remoteid {
    key_id = "qnap";
  }
  mode = phase1_mode_aggressive;
  phase1ss = "all/all/all";
  keytype = connkeytype_pre_shared;
  key = "f3e0hcca19ca2a3gaafbI.{1dGe3q8f84";
  cert_do_server_auth = no;
  use_nat_t = yes;
  use_xauth = yes;
  xauth {
    valid = yes;
    username = "qnap";
    passwd = "qnappassword";
  }
  use_cfgmode = yes;
...
Configuring vpnc on your Linux box
The Fritz!Box needs both draft-ietf-ipsec-nat-t-ike-03 support and the client to adopt the server suggested lifetime (which for the Fritz!Box is 3600 seconds). These features where only added to vpnc recently, so make sure your vpnc is newer than subversion revision 511. Both the version in Debian Unstable and any Ubuntu newer than Precise (12.04) have vpnc 0.5.3r512, which is new enough version and you can just apt-get install vpnc. For Fedora 17 x86 systems you can find RPMs at http://www.pabloendres.com/2013/02/27/vpnc-and-fritzbox/
Create the vpnc config in /etc/vpnc/fritzbox.conf using the following as a template (replace the parts in bold/brackets):
IPSec gateway ip address or DNS name of your FritzBox

IKE DH Group dh2
Perfect Forward Secrecy nopfs

IPSec ID [username entered into the "Enter the user's email address" screen]
# "key" from the Fritz!Box VPN configuration
IPSec secret [shared secret key from the "Key for the connection" screen]

NAT Traversal Mode force-natt

Xauth username [username entered into the "Enter the user's email address" screen]
Xauth password [password entered into the "Key for the connection" screen - Not the password use to encrypt the vpnc configuration!]
As this file contains usernames and password, the config file should be owned by root and only readable by the owner.
sudo chown root /etc/vpnc/fritzbox.conf

sudo chmod 0600 /etc/vpnc/fritzbox.conf
You should now be able to connect to your home internet using:
sudo vpnc-connect fritzbox
When you are finished, use:
sudo vpnc-disconnect fritzbox
Internet Access while using vpnc
When vpnc connects it will change your default route to go via the tunnel. This will send all your local internet traffic over the VPN connection. If you are setting up the VPN to secure your internet browsing while on a hostile network such as a public WiFi hotspot (such as at a coffee shop) this is what you want.
However, if you just want to be able to access the hosts on your home network, you don’t want this as it will make your internet browsing extraordinarily slow. These routes are set up by /etc/vpn/vpnc-script script, so you will need custom one. Normally this script is provided a lot of information when connecting to other VPN concentrators (such as a Cisco EasyVPN device) but when connecting to the Fritz!Box you only seem to get limited information.
I created the following script in /etc/vpnc/fritzbox-script, marked it as executable (chmod a+x /etc/vpnc/fritzbox-script) and then added “Script /etc/vpnc/fritzbox-script” to my /etc/vpnc/fritzbox.conf file.
#!/bin/sh

IPROUTE=/sbin/ip

case "$reason" in
  pre-init)
    /etc/vpnc/vpnc-script pre-init
    ;;
  connect)
    INTERNAL_IP4_PREFIX=$(echo $INTERNAL_IP4_ADDRESS | sed -e's/\.[0-9]\+$//')
    $IPROUTE link set dev "$TUNDEV" up mtu 1024
    $IPROUTE addr add "$INTERNAL_IP4_ADDRESS/255.255.255.0" peer "$INTERNAL_IP4_ADDRESS" dev "$TUNDEV"
    $IPROUTE route replace "$INTERNAL_IP4_PREFIX.0/255.255.255.0" dev "$TUNDEV"
    $IPROUTE route flush cache
    ;;
  disconnect)
    $IPROUTE link set dev "$TUNDEV" down
    ;;
  *)
    echo "unknown reason '$reason'. Maybe vpnc-script is out of date" 1>&2
    exit 1
    ;;
esac
exit 0
Fritz!Box encrypted VPN configuration files
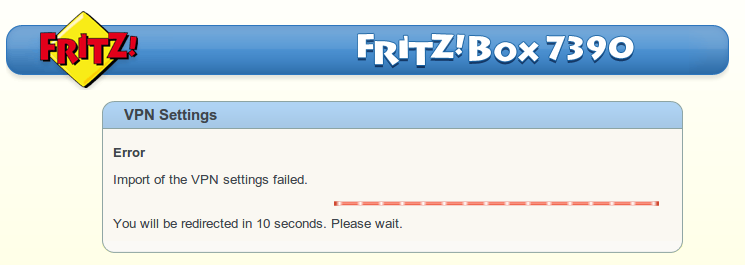
Fritz!Boxes will only accept VPN configurations which are encrypted. Otherwise when try to import the file you will get the cryptic "Error: Import of the VPN settings failed." as seen below;
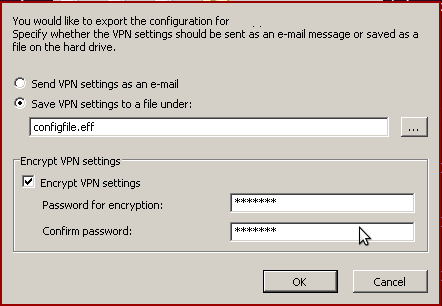
To create an encrypted file you must use the FRITZ!Box VPN Connection tool. Then when exporting, select "Save VPN settings in a file under" option, check the "Encrypt VPN settings" check box (the file type should change to .eff), and enter your chosen password twice.